Part 1: Getting your Raspberry Pi (rpi) Setup
Time Allotment:
- 1hr to order parts (if you don't have it). Estimate ~$200 USD.
- 1hr-3hr to execute (depending on skill level and snags)
Full Kit Equipment
- Micro SD card 8Gb+ & Adapter, Recommend: Amazon 32gb card ~$15
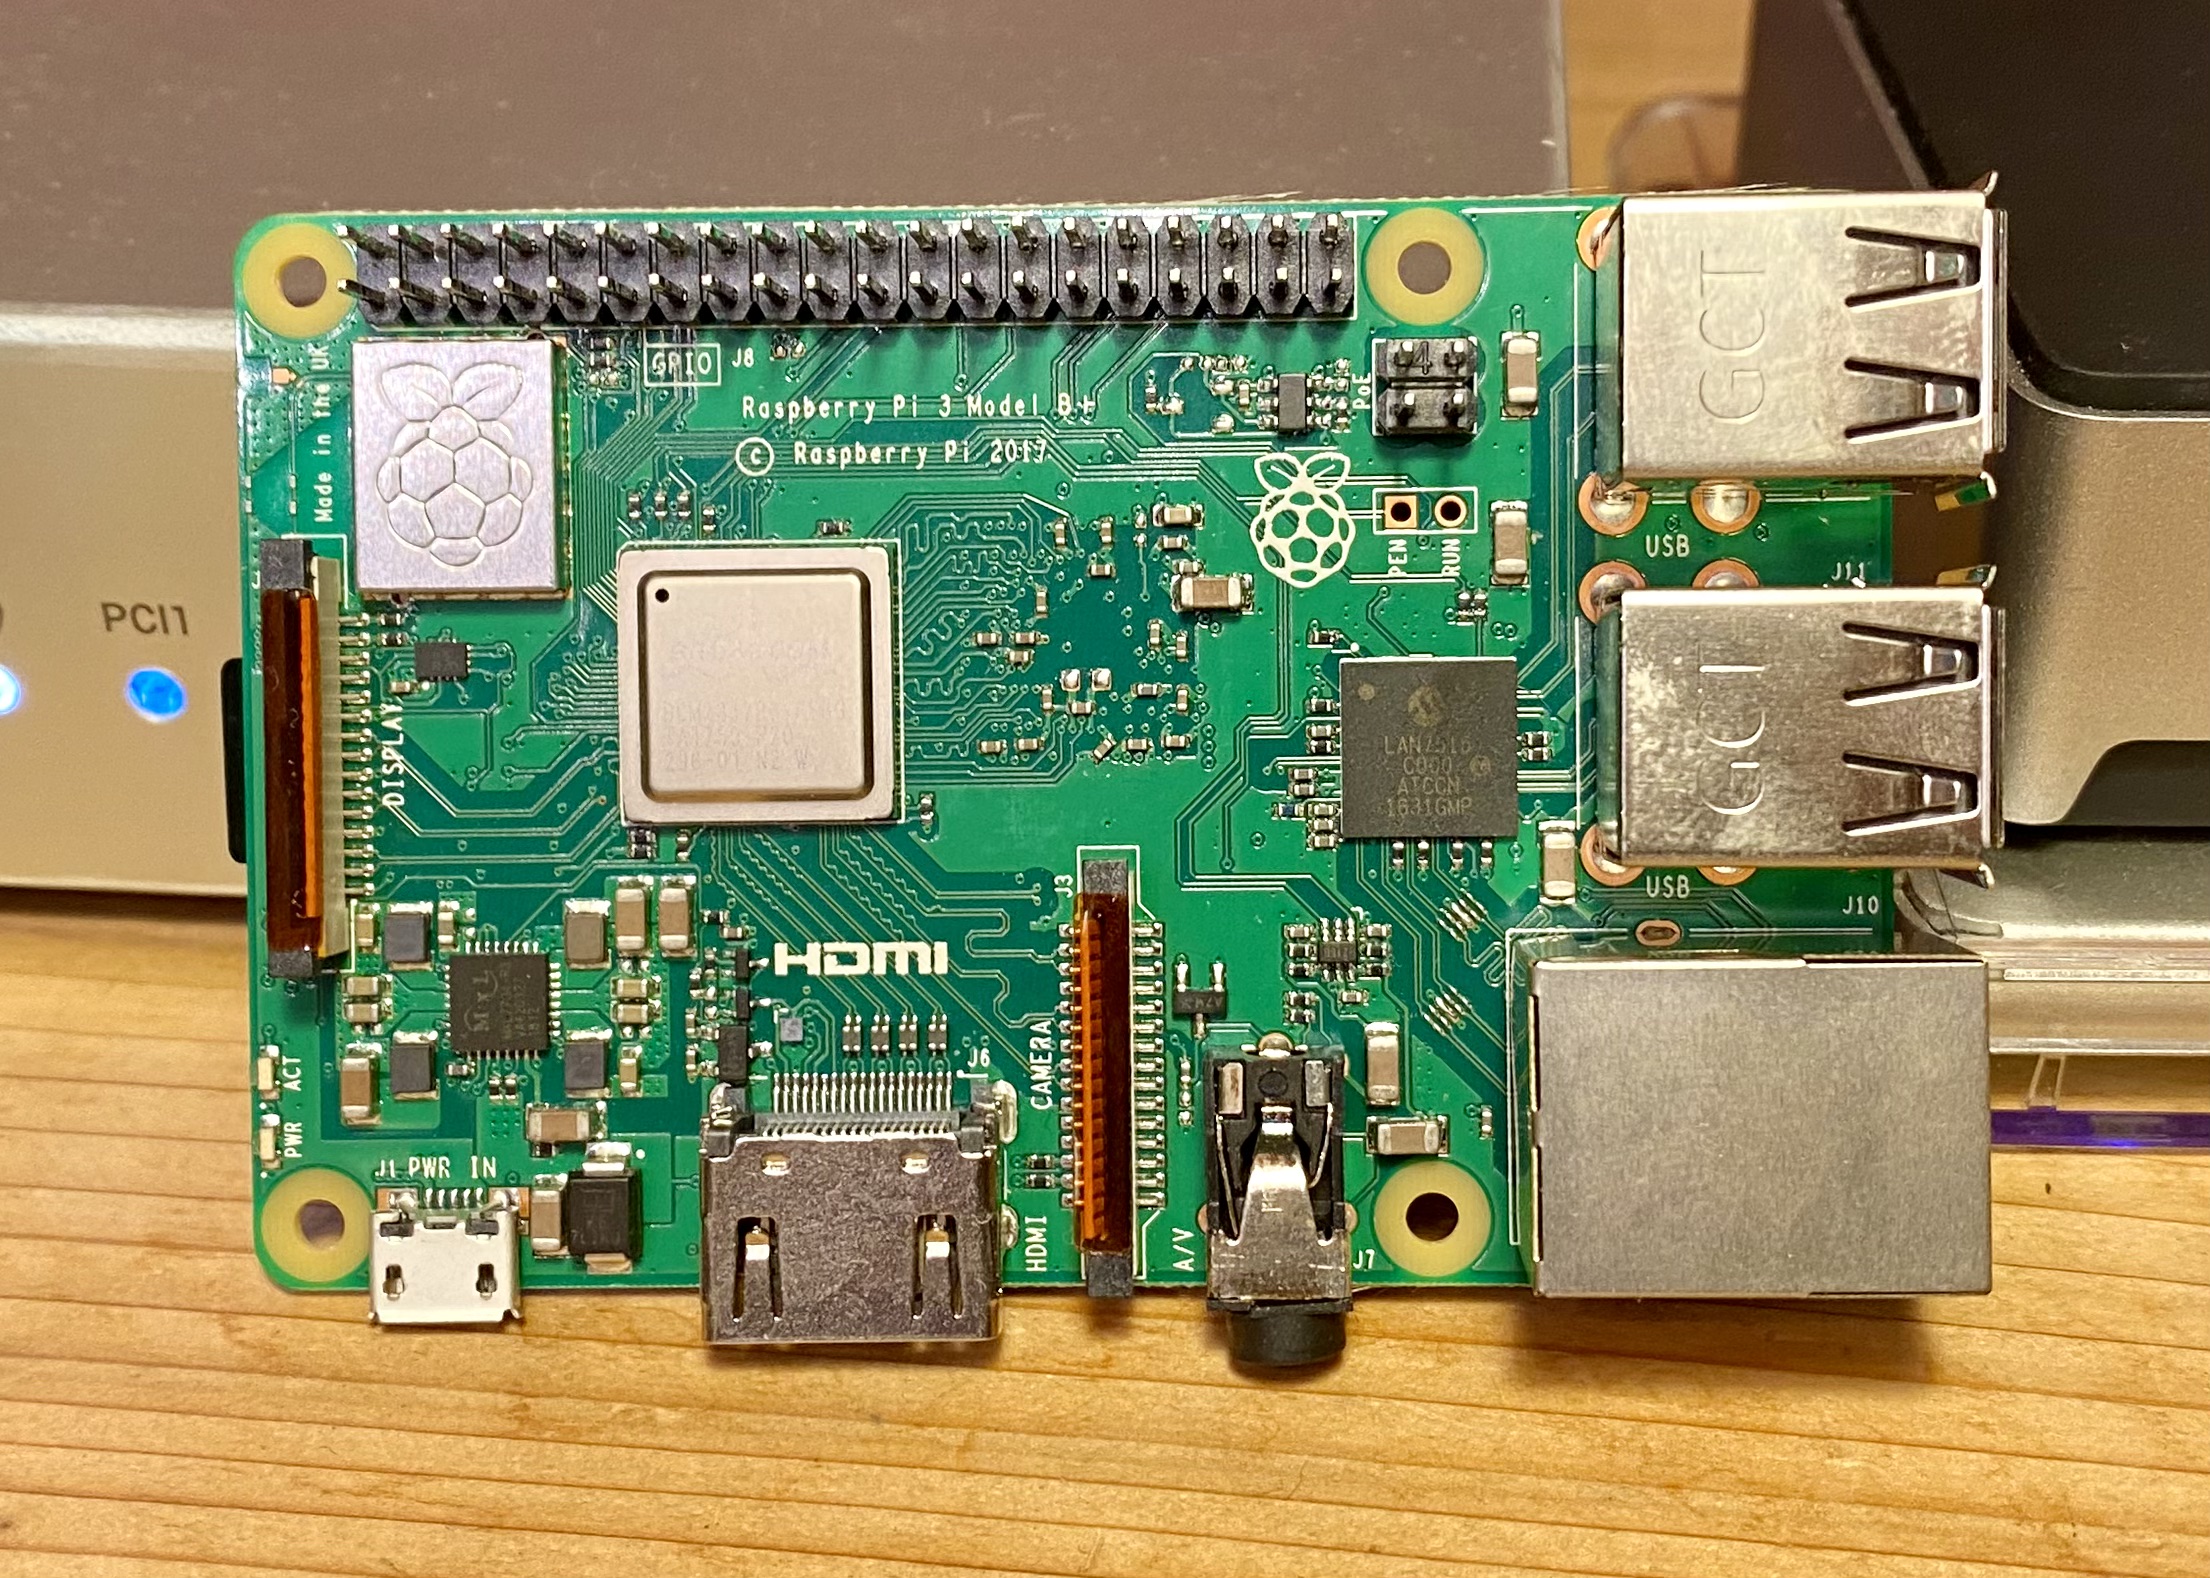
- Raspberry Pi 3b+ or 4 (tutorial is on a 3b+), Pi Shop, Recommend: Amazon Pi 4 ~$70
- I would probably go with a Pi 4 and 4-to-8GB RAM. The 4s also seem like they are in stock, 3b+ have been sold out.
- You might need a 1ft USB cord if the rpi is close to your router, recommend hard line connection, though wifi is okay too
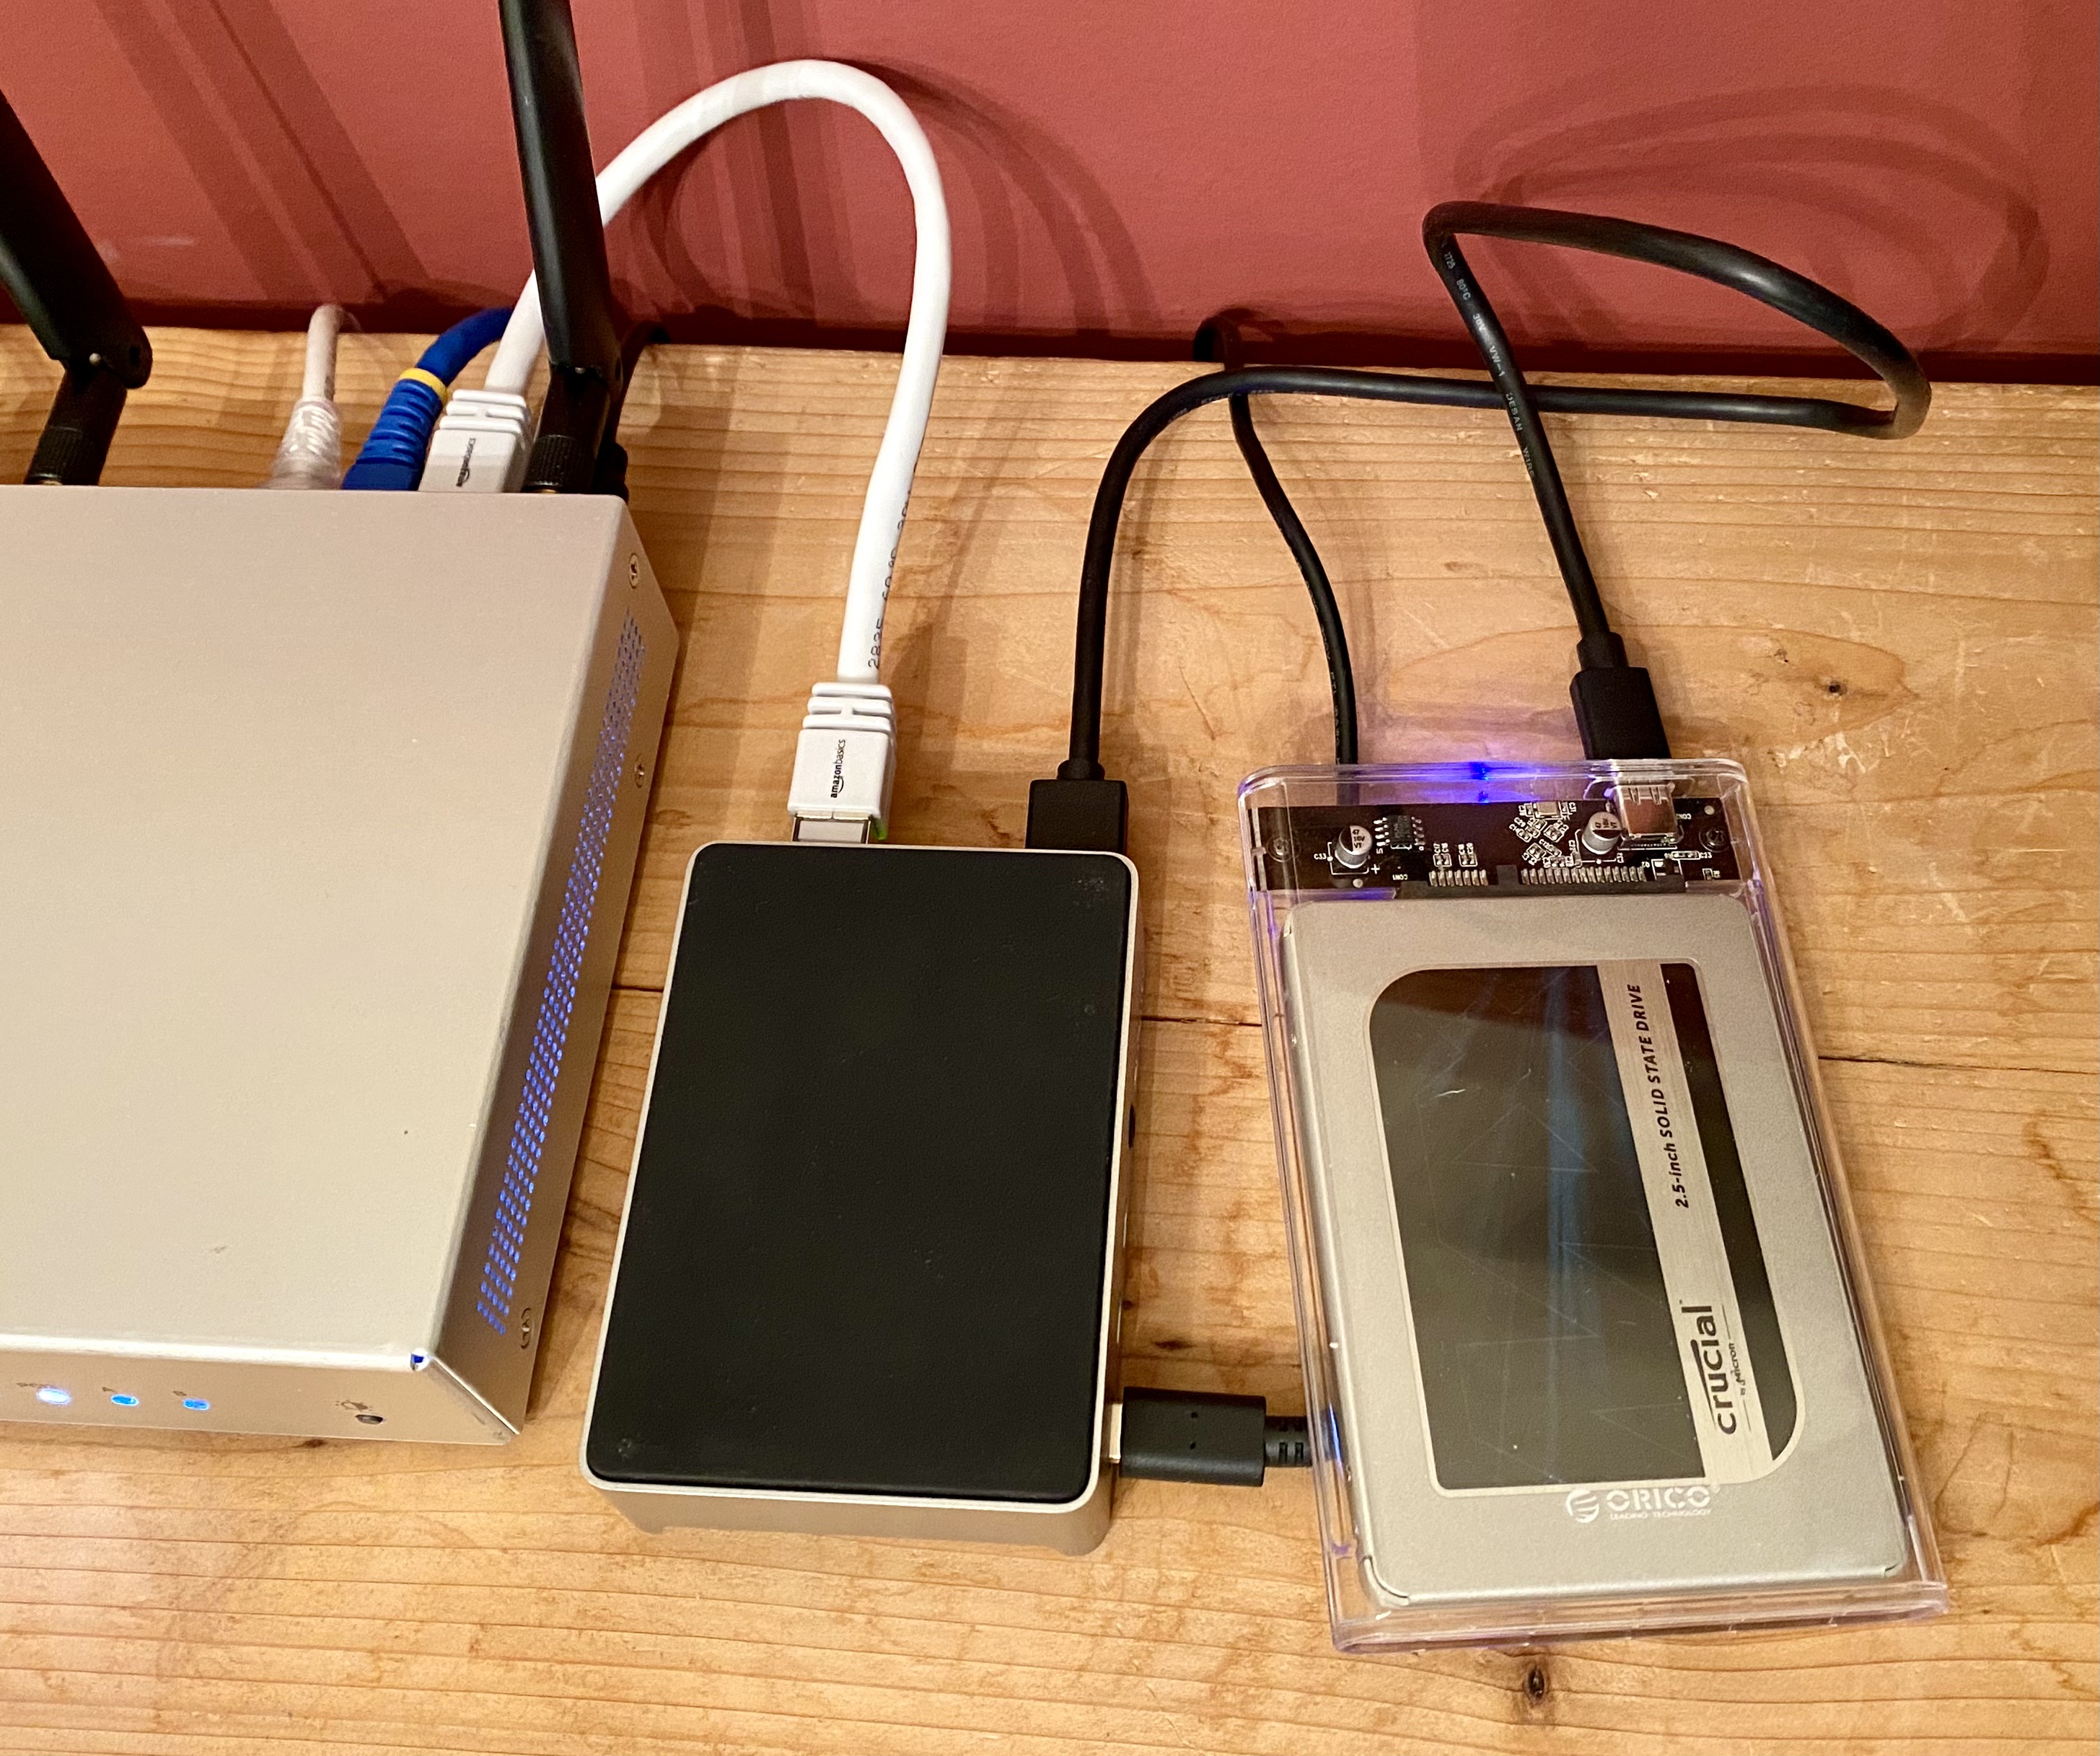
- External Solid State Drive (SSD) memory, Recommend: Amazon SATA SSD 1Tb ~$80
- SSD Case & Cord, Recommend: Amazon ORICO 2.5'' External Hard Drive Enclosure ~$7
- Raspberry Pi Power Cord, Pi 4 Shop recommended ~$8
- Be careful! The Pi 3b+ has a different power cord than the Pi 4! The Pi 4 requires more power.
- However, the Pi 4 power has a USB-C that can be used on the 3b+, I use it and works fine.
- Raspberry Pi Case, Recommend Amazon Flirc metal case
- Just make sure the case is a good heat sink, has a fan, or airflow.
Setup & Configuration
Operating System (OS) Flashing Setup
This part covers "flashing" (writing) the raspberry pi Operating System (OS) into firmware memory.
💡 HEADS-UP: The first tutorial trials flashed the OS right to the SD Card. It quickly became apparent the RAM & Log storage filled up the SD Card memory (30MB). In fact, you can actually flash and boot up right into the external USB storage drive, no mounting required either!
Download the Raspberry Pi Imager.
You could follow the Raspberry Pi Documentation: Installing the Operating System, however I found watching the following youtube video much more helpful and easier to get an idea of what we're doing: Youtube: Headless Raspberry Pi Zero Setup.
- Open the Raspberry Pi Imager GUI
- Choose Raspberry Pi OS Lite 64bit under "Raspberry Pi OS (other)"
- 32-bit is the safe option. Seems 64bit OS is compatible and tested with the 3b+
- Lite for headless (no Desktop GUIs)
- Plug in the external USB storage drive
- Choose the external memory to write to in the rpi GUI
- Bottom right click gear for advanced settings options
- Set hostname, rename raspberrypi to "headless"
- you can use your own username but the headless is used in this tutorial
- Yes Enable SSH
- Yes "Use password authentication"
- Fill in username and password to login to the rpi.
- Update username to "pi" (or whatever name you want but pi is used here)
- Yes Enable it to connec to the wifi
- Note SSID is home "wifi name"
- Type in the password
- Save
- Write
The first time takes a few minutes, grab a coffee ☕
Hardware Assembly & Checking Pi IP Address
Assembly the rpi and connect it to your router. Trust me this saves time because you'll check your router for headless.local IP address.
However, upon boot up it should connect on your wifi, and from your router page, you should be able to find it connected. (Type in your router 192.168.XXX.YYY into your browser).
- Put the pi in the case
- Connect the flashed memory into in rpi
- Connect the rpi to power
- Connect it to your Internet Router hardlined via ethernet connection (easier to troubleshoot, can do wifi later)
- Put the SSD Drive into the case, but do not connect it to the rpi yet!
- Pi takes about 5 minutes to boot up. Wait 5 minutes before trying to ssh in.
Getting into your rpi
Now this part can be daunting, but let's dive in.
- Open terminal (use your mac or windows search, type in terminal)
- Unfamilar? Youtube "command line terminal tutorial your_operating_system_here" (e.g. command line terminal tutorial macos)
Secure shell into the rpi, if setup correctly this should work.
ssh pi@headless.local
Recall pi is the username and headless.local is the IP address.
If you get this warning "WARNING: REMOTE HOST IDENTIFICATION HAS CHANGED!" Odds are you already have known ssh keys into the pi. You'll need to delete them and basically start fresh.
cd to home, then cd into the hidden .ssh folder
cd
cd .ssh
Next you'll open the known_hosts folder which keeps the username public keys. You'll then delete all the former pi@headless.local logins
nano known_hosts
Ctrl+k on the lines with headless to wipe them out (nice little trick).
If there are still ssh failed attempts, in terminal:
- cd //to home folder (directory)
- cd .ssh //directories with a dot in front are hidden
- nano known_hosts //to check ssh connections
- (need to troubleshoot further...)
- ssh? Article: What is SSH?
Update the pi and config updates
Update & upgrade the pi packages
sudo apt-get update
sudo apt-get upgrade
This is where most of the configuration is done for the rpi. Feel free to explore it.
sudo raspi-config
Congrats! That's it (much easier to boot right from the external memory, already mounted and partitioned).
External Hardware Mounting if booting from the SD Card
IF you chose the hard route, flashing and booting from the SD Card and using a separate external USB memory storage, you'll have to perform these steps.
This is to allow the external SSD drive memory to be attached and not freeze the rpi. This does not come default in Lite.
You'll probably notice your rpi did not boot up if you booted from the SD Card and have the external memory already connected.
You'll need to reboot (remove power) and disconnect the USB memory. Then start up.
This is a little involved so prepare yourself for battle!
=====Mounting Hard Drive====
Find the external drive device name
Lists all memory disks and partitions. More on fdisk.
sudo fdisk -l
The SATA SSD external memory here is Disk /dev/sda: 931.51 GiB. It is identified as /dev/sda.
It is by default listed with two partitions:
Device Start End Sectors Size Type /dev/sda 409640 1953525127 1953115488 931.3G ext4
Now we need to delete the partitions and create a new one with a desirable file storage type ext4 just in case it's not already ext4.
delete the default partitions
sudo fdisk /dev/sda
You should see "Welcome to fdisk (util-linus version)"
Type in d to delete the partitions (repeat until they are all gone).
Hit enter to default select the partition to delete.
Create new partition with desired file type
Type in n to create a new partition.
Hit enter for default 3 times
You should see "Created a new partition 1 of type 'Linux filesystem' and of size 931.5 GiB."
To check, type in p for partition. Mine looks like this:
Command (m for help): p
Disk /dev/sda: 931.51 GiB, 1000204886016 bytes, 1953525168 sectors
Disk model: 500SSD1
Units: sectors of 1 * 512 = 512 bytes
Sector size (logical/physical): 512 bytes / 4096 bytes
I/O size (minimum/optimal): 4096 bytes / 4096 bytes
Disklabel type: gpt
Disk identifier: A59F918E-3EBE-445F-8E0D-951CD93129C8
Device Start End Sectors Size Type /dev/sda1 2048 1953525134 1953523087 931.5G Linux filesystem
To confirm, type in w to write this to disk.
You should see "The partition table has been altered."
To check:
sudo fdisk -l
My final version looks like this. Note the dev/sda1 Device name and Disk identifier number. We'll need those later:
Disk /dev/sda: 931.51 GiB, 1000204886016 bytes, 1953525168 sectors
Disk model: 500SSD1
Units: sectors of 1 * 512 = 512 bytes
Sector size (logical/physical): 512 bytes / 4096 bytes
I/O size (minimum/optimal): 4096 bytes / 4096 bytes
Disklabel type: gpt
Disk identifier: A59F918E-3EBE-445F-8E0D-951CD93129C8
Device Start End Sectors Size Type /dev/sda1 2048 1953525134 1953523087 931.5G Linux filesystem
create a new filesystem
What is a filesystem? Arch Linux, filesystem, wiki, a goto resource says:
"In computing, a file system or filesystem controls how data is stored and retrieved. Without a file system, information placed in a storage medium would be one large body of data with no way to tell where one piece of information stops and the next begins. By separating the data into pieces and giving each piece a name, the information is easily isolated and identified."
Let's make the filesystem of storage an ext4 type compatible with rpi OS / linux.
sudo mkfs -t ext4 /dev/sda1
Where dev/sda1 is the new partition name pointer.
mount the drive and ensure it mounts on restart
If not already create, make a "mount" /mnt directory, and name a file within, here hd1 for harddrive1.
sudo mkdir /mnt/hd1
Next, change the permissions or ownership of the folder from super user root to regular user.
sudo chown $USER:$USER /mnt/hd1
Note:
- chmod is the command to "change owner" or access to file systems.
- pi:pi in this tutorial is specific for user:user, where user:user is the general case. If not sure, type in
usersin terminal.
sudo blkid
Where blkid locates or prints block devices. A block device reads/writes to memory one "block" at a time.
Grab the /dev/sda1 UUID #
Here's what my output looks like:
pi@headless:/mnt $ sudo blkid /dev/mmcblk0p1: LABEL_FATBOOT="bootfs" LABEL="bootfs" UUID="9E81-4F92" BLOCK_SIZE="512" TYPE="vfat" PARTUUID="2ac7bef0-01" /dev/mmcblk0p2: LABEL="rootfs" UUID="cf2895ca-6dc2-4797-8040-f76ba1508f41" BLOCK_SIZE="4096" TYPE="ext4" PARTUUID="2ac7bef0-02" /dev/zram0: UUID="9ba6ae2f-9e71-4ee1-84f3-b5a32d78cf7f" TYPE="swap" /dev/sda1: UUID="38e049f5-e511-49a3-a784-f8dad186303c" BLOCK_SIZE="4096" TYPE="ext4" PARTUUID="17672728-73c0-ad44-b194-941fcccad345"
Specifically 38e049f5-e511-49a3-a784-f8dad186303c
Time to mount. What is mounting a drive? Stackexchange says:
"Mounting is the act of associating a storage device to a particular location in the directory tree."
sudo nano /etc/fstab
This gets inside the file to locate the mounted memory storage partition.
fstab is used to define how disk partitions, various other block devices, or remote file systems should be mounted into the file system.
UUID=<UUID_number_here> /mnt/hd1 ext4 nosuid,nodev,nofail 0 1
For me it is UUID=38e049f5-e511-49a3-a784-f8dad186303c /mnt/hd1 ext4 nosuid,nodev,nofail 0 1
nofail allows the server to boot if the drive is not inserted. Similar for the others.
sudo mount -a
To execute everything in the fstab file
lsblk
Lists the memory
pi@headless:~ $ lsblk NAME MAJ:MIN RM SIZE RO TYPE MOUNTPOINT sda 8:0 0 931.5G 0 disk └─sda1 8:1 0 931.5G 0 part /mnt/hd1 mmcblk0 179:0 0 29.8G 0 disk ├─mmcblk0p1 179:1 0 256M 0 part /boot └─mmcblk0p2 179:2 0 29.6G 0 part / zram0 254:0 0 5.7G 0 disk [SWAP]
sda1 looks good
To check the read write works
cd /mnt/hd1/
touch test
you'll get touch: cannot touch 'test': Permission denied
so cd up a level and change mode on the directory
cd ..
sudo chown -R $USER:$USER /mnt/hd1
changes permissions in directory hd1 to read write
To test it works
cd hd1
touch test
it should work now
too make sure, we need to reboot
sudo reboot now
ssh back in (takes 1-3 minutes to reboot)
ssh pi@headless.local
cd /mnt/hd1
touch test2
ls
If you see "test" and "test2", you did it right.
Now, the last thing is to make sure the newly mounted filesystems are read-write.
type in mount to see everything mounted and the "rw" for read-write.
mount
You should see /dev/sda1 and read-write (rw) capable:
/dev/sda1 on /mnt/hd1 type ext4 (rw,nosuid,nodev,relatime)
If it's not rw, make the mounting directory read-write:
sudo mount -o remount,rw /mnt/hd1
This enables you to move files from the home directory to the mounted sda1 storage in /mnt/hd1
Congrats! You made it. No small feat.